You know when you’re brainstorming and someone says, “What if we did this [cool but not fully formed idea]?” And somebody else says, “Yeah! And how about if we took that and did this [other cool but still not fully formed thing]?”
That’s what this “How about … ” series is. It’s where our creative team experiments with ideas we’ve kicked around or cool techniques we’ve seen. It may be messy, definitely not fully formed, but we hope it will get your own “how about …” wheels turning.
In our kick-off video, art director Drew Ng-How-Tseung tried his hand at reverse motion stabilization.
Oh hi! I didn’t see you come in. How are you? I’m fine. Got any cool plans for the summer?
So you are curious how to get that “Frame Train” effect? There are actually a couple techniques going on in this video:
• Reverse motion stabilizing of locked-off shots
• Match-cut wipe transitions (I think that’s probably what people call them. Don’t Google it, just believe me.)
You’ll need:
• Footage
• Adobe After Effects
• A positive “it’ll-do” attitude
Step 1: Get the footage
Part of what makes “Frame Train” distinctive is the locked-off shots of people moving horizontally through the frame. Ideally the camera is totally immobile, and the subject begins (and ends) their action completely out of frame, with a few seconds of padding on either end.
You can shoot the footage yourself if you have a couple friends willing to walk in front of your camera. If you find yourself friendless, however, you can license locked-off clips from Dissolve. Tell ’em Drew sent you. It won’t get you a discount, but I bet they’d like to know if anyone read this blog post.
Step 2: Reverse stabilize motion
If you really want this blog post to deal with the nitty-gritty of stabilizing footage, this is literally the first video that came up when I searched “stabilize motion after effects” in YouTube.
Pretty good, right? Now do the opposite of that!
You’ve seen the Stabilize Motion function in After Effects used to eliminate some unwanted camera shake from footage. But for our purposes, we’ll be taking unshaky footage and stabilizing a moving subject (our example features this cool vacation spaceman):
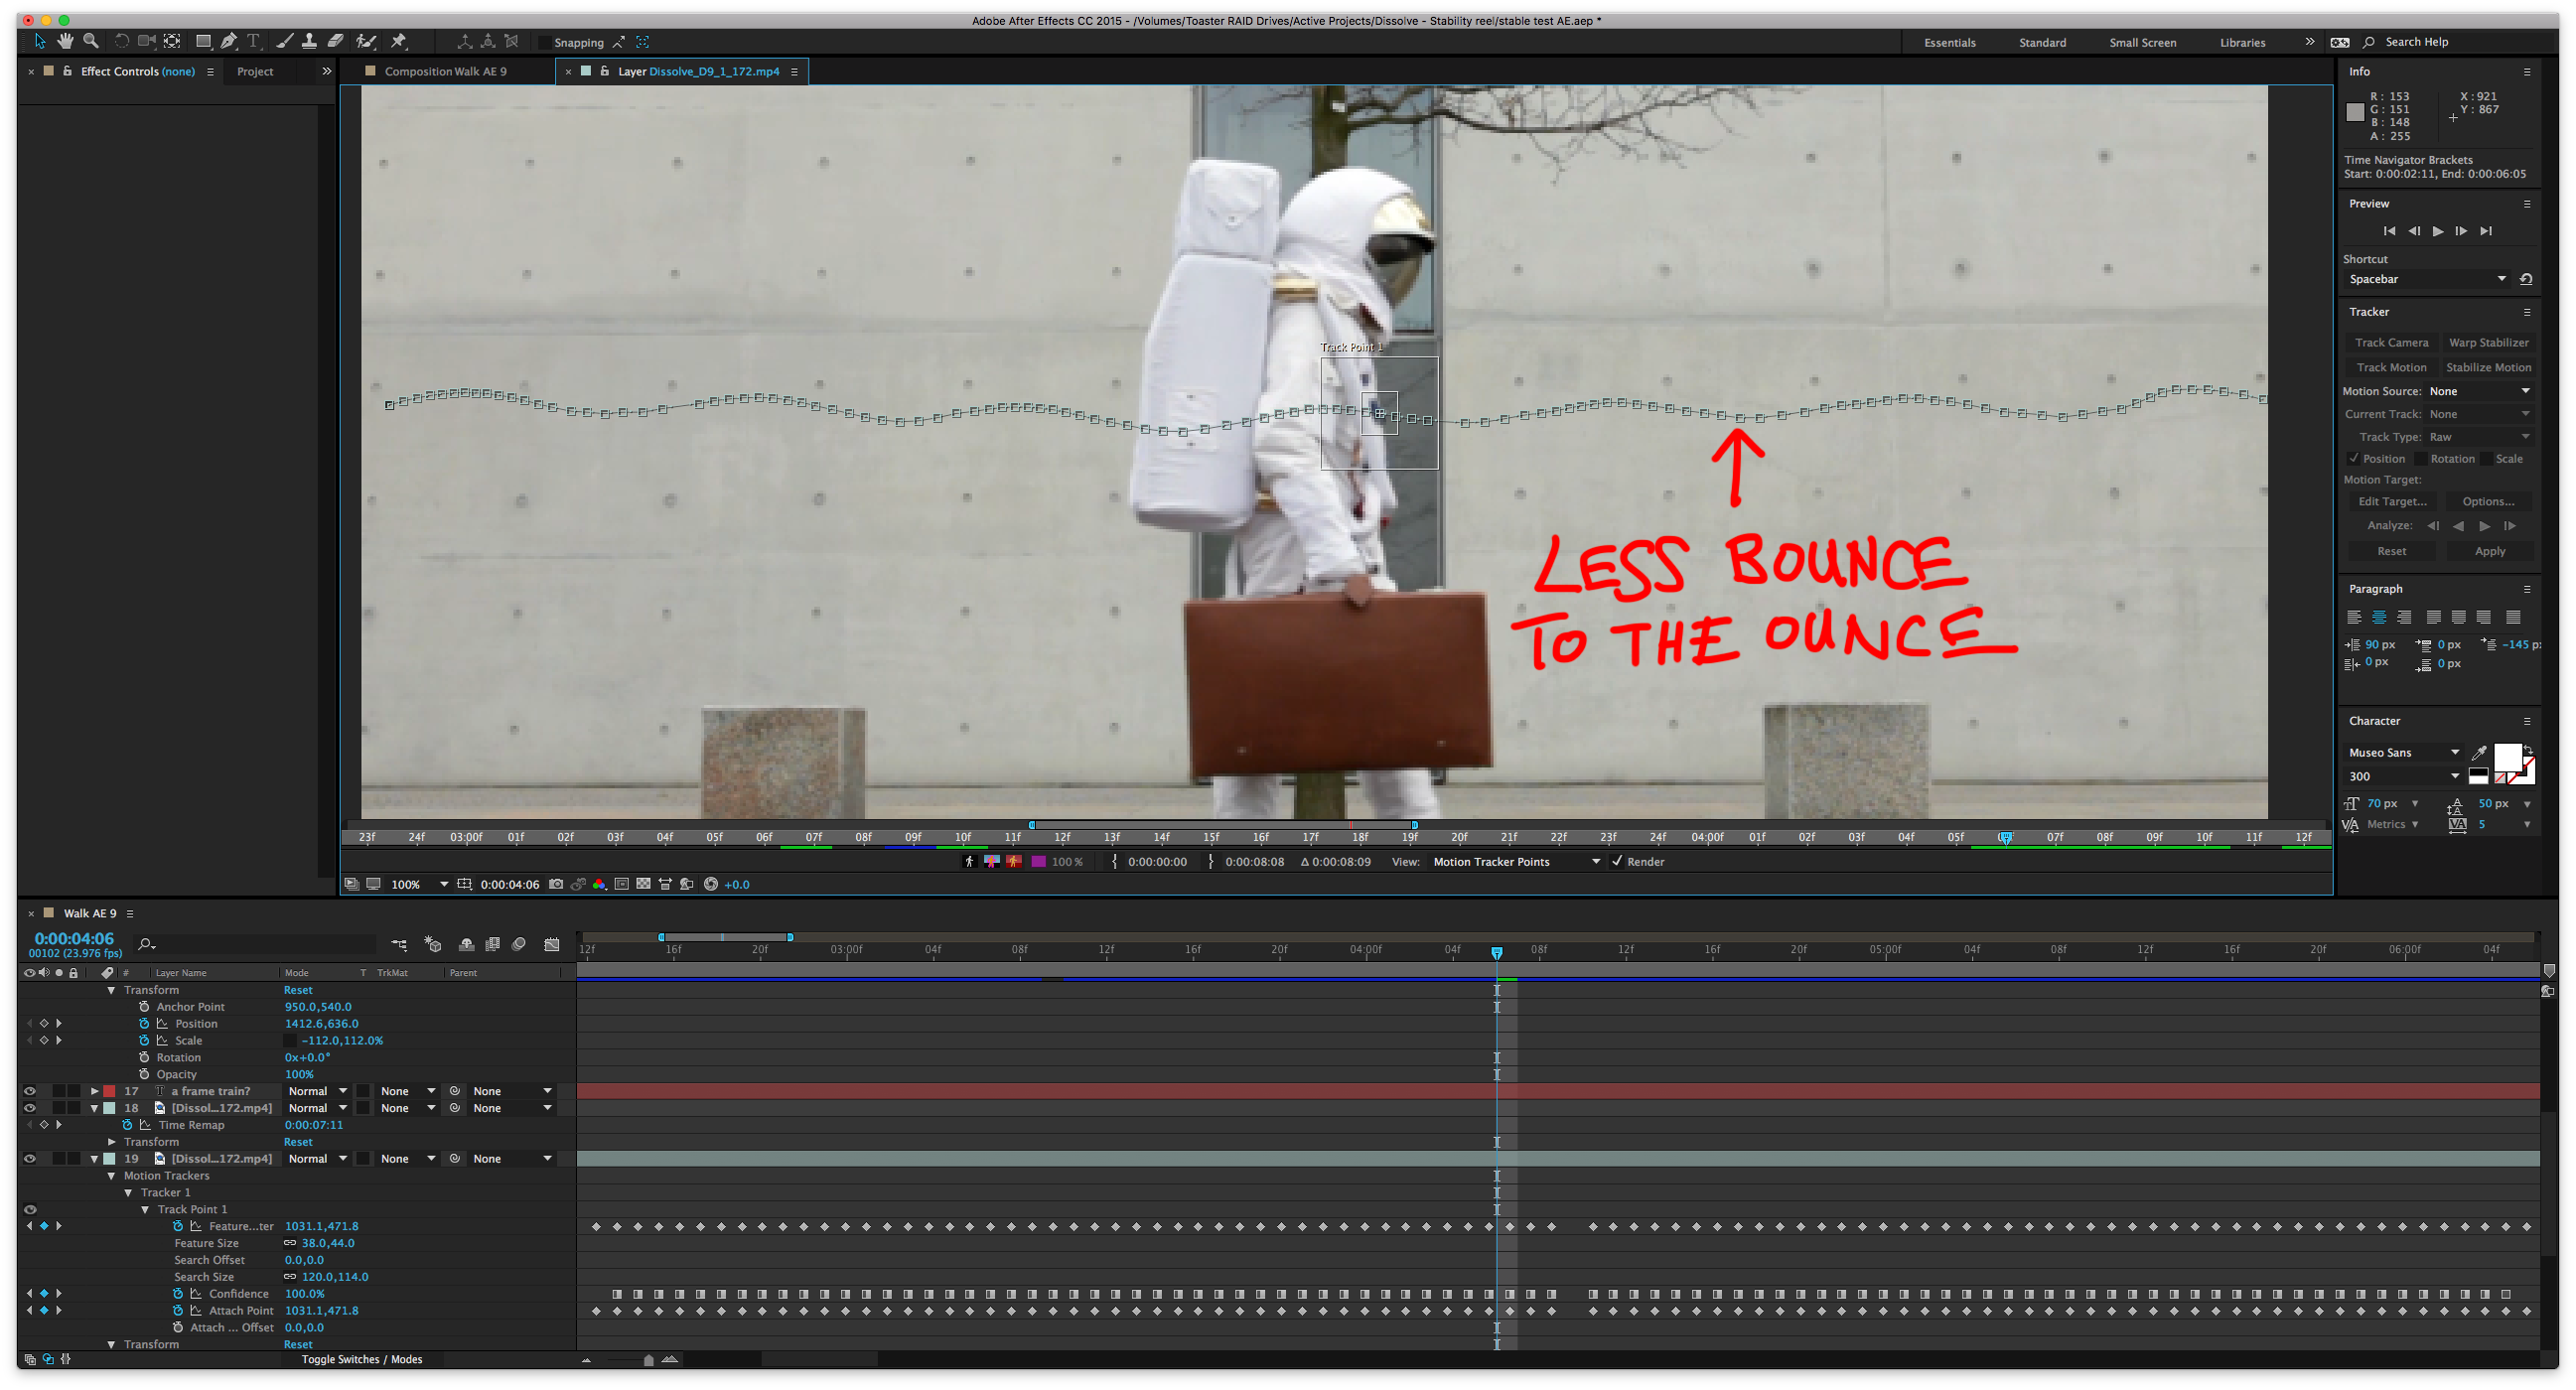
(Since there won’t be any data for the motion tracker to follow before and after the subject is in frame, you’ll need to take a guess at the trajectory of the subject before and after it appears.)
You’ll notice he bounces up and down a bit as he walks, but all we care about is the horizontal motion. So when you apply the motion tracker, select only Dimension X.

Step 3: Centre the subject
After you’ve applied the motion tracker, your footage probably jumped almost completely out of frame. Just drag the clip horizontally until the subject appears in the center of the frame. He should now look sort of like Fred Flintstone running in place while the background whizzes by.
Step 4: Match-cut wipe transition
Now that the spaceman is all set up, let’s turn him into a skeleton! Our animated skeleton clip is already walking in place, but if we wanted to transition the spaceman into another locked-off clip, we could just repeat the above steps. In order to fake our reverse motion stabilization effect with the skeleton, I simply applied a mask to replicate the movement of the subject from one side of the frame through to the other.
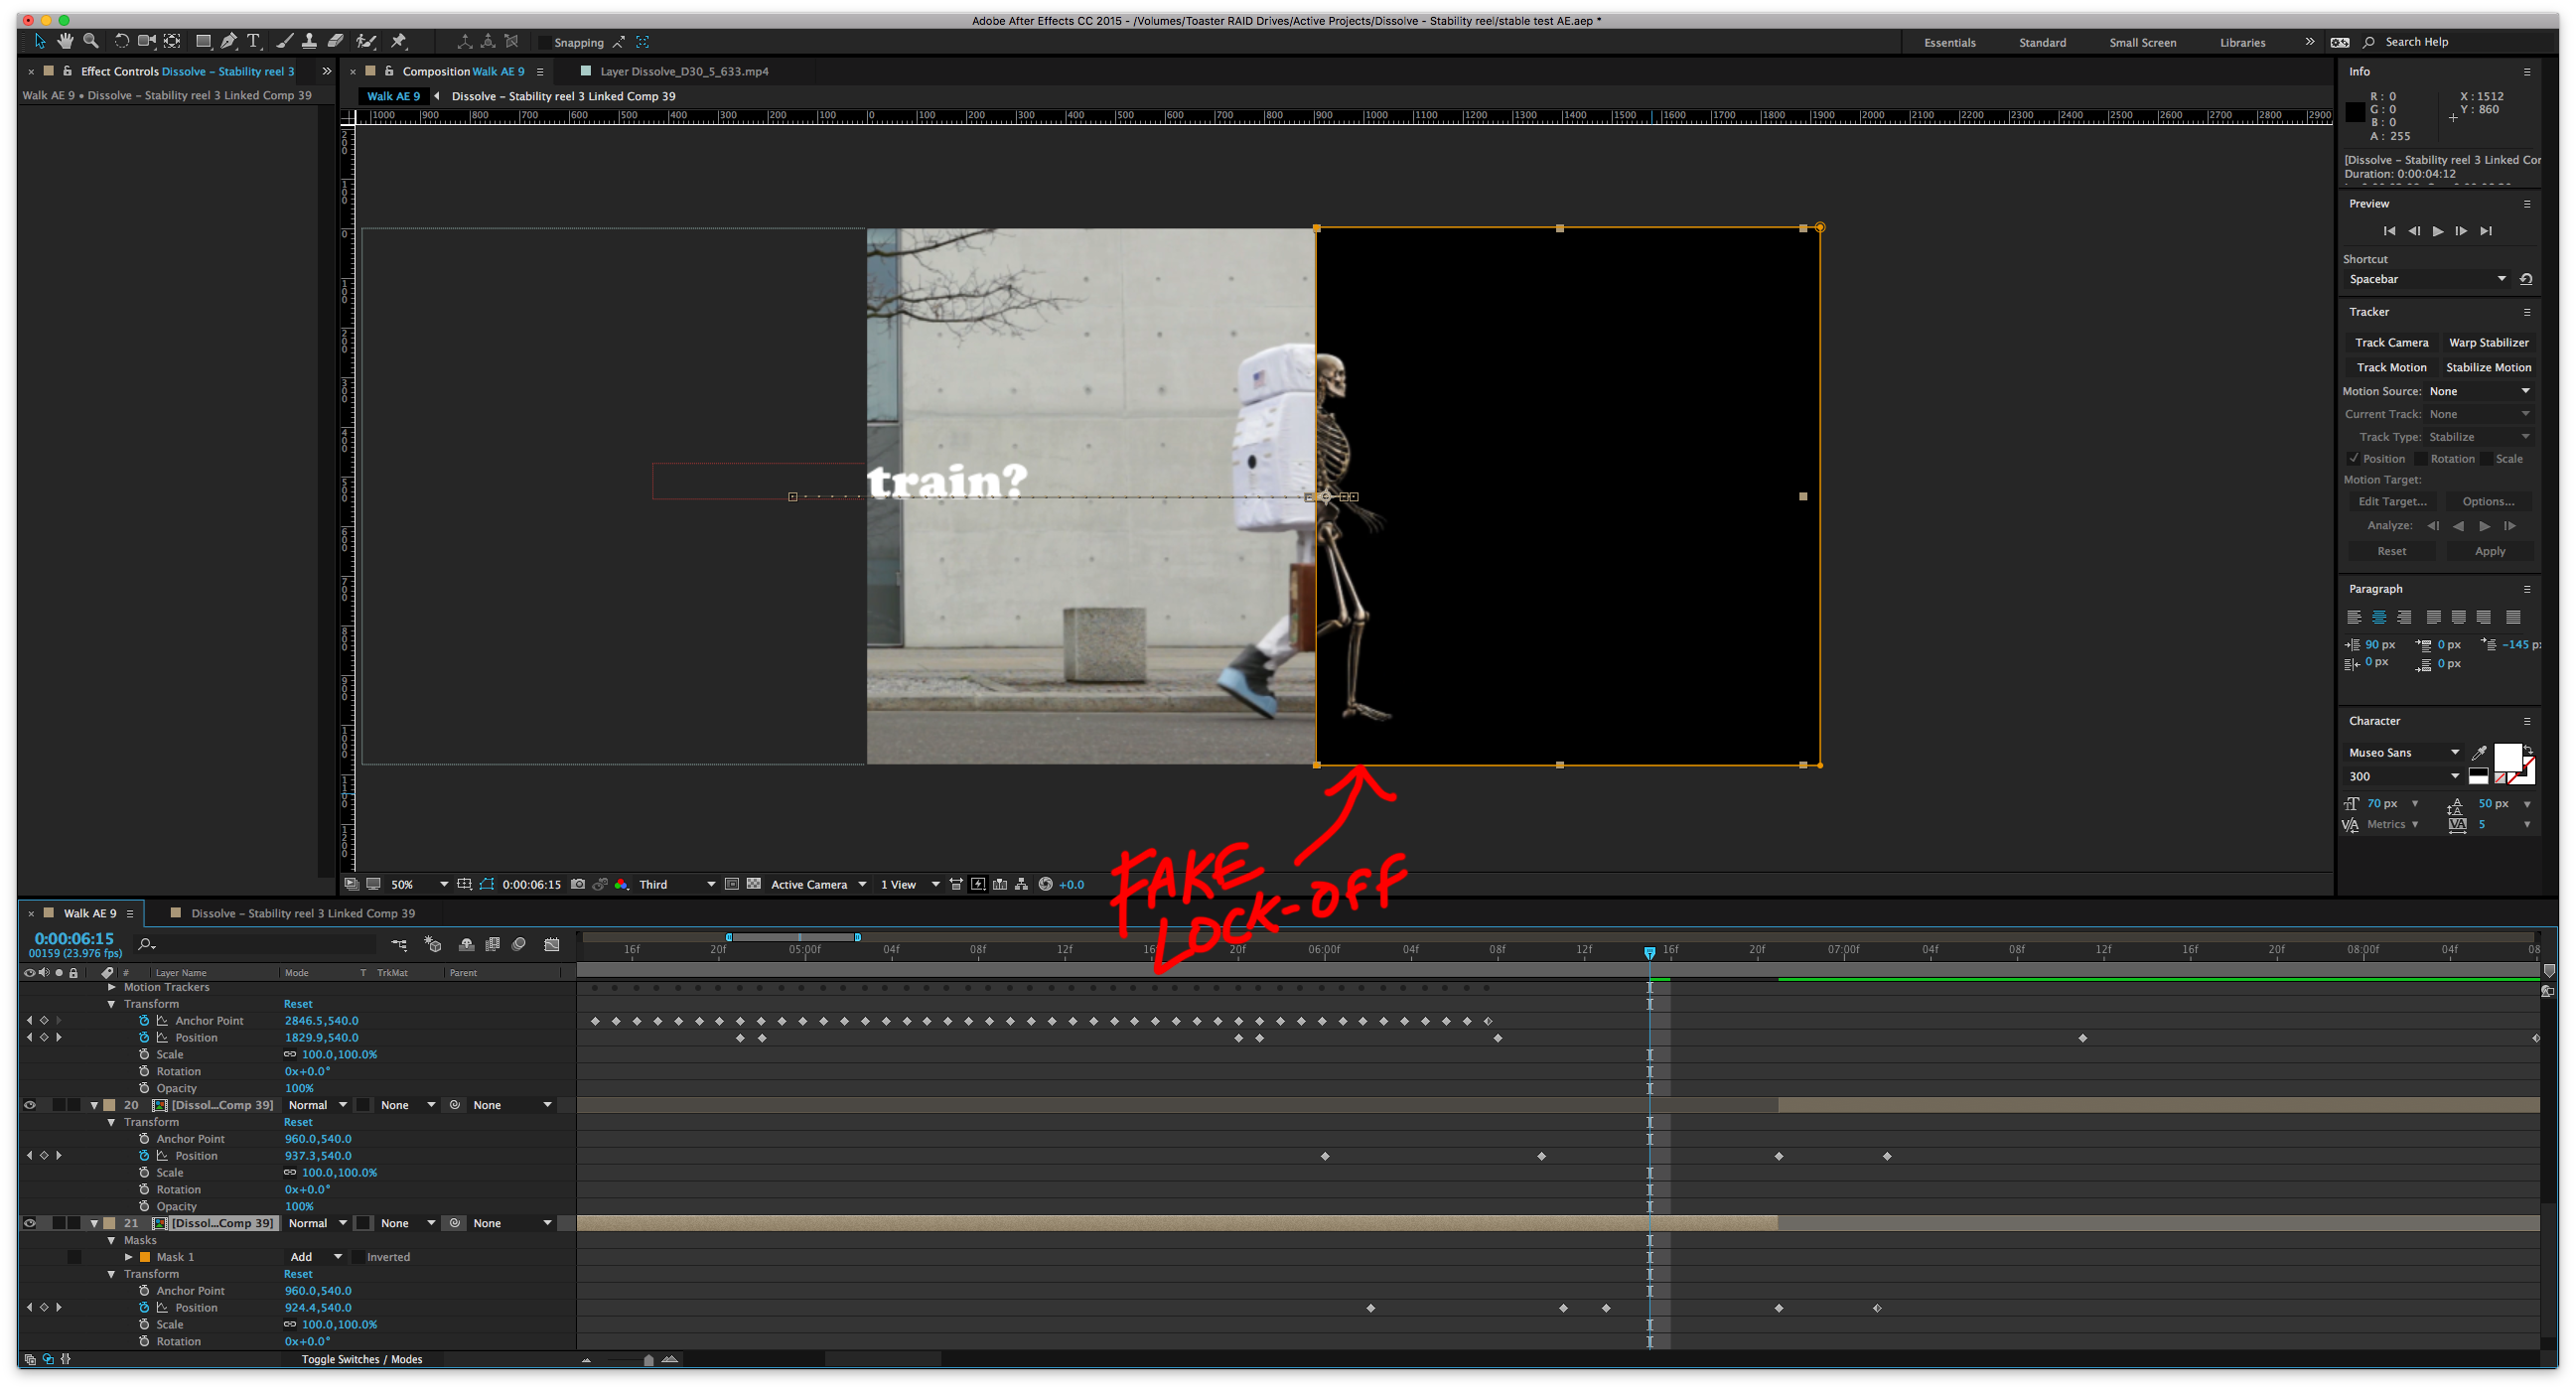
Step 4a: Match-cut wipe transition — not enough footage!
The spaceman/skeleton transition provided another little challenge: there wasn’t enough spaceman footage to fill up the time it took for the skeleton footage to reach the edge of the frame! As luck would have it, using locked-off footage of concrete allows us to simply freeze-frame the end of the clip, and move the still out of frame (the rate of movement will be dictated by the walking speed of the subject).

And that is how “Frame Train” was hacked together! I guess there was some other little stuff too, like how Skeletor slowly changed scale and position to better align with Lawnmowerman, or how cropping the 4K clip of the woman walking through Iceland gave us extra flexibility with scale and timing, or carefully choosing footage with similar movement speeds. But that stuff is boring!
There’s also something called “J-cut” and “L-cut” transitions happening, but who cares about audio anyway?! Actually the people at Soundsnap care a lot and they’re great. We got all the audio effects from them.
BONUS AMATEUR TIP: The Jitters
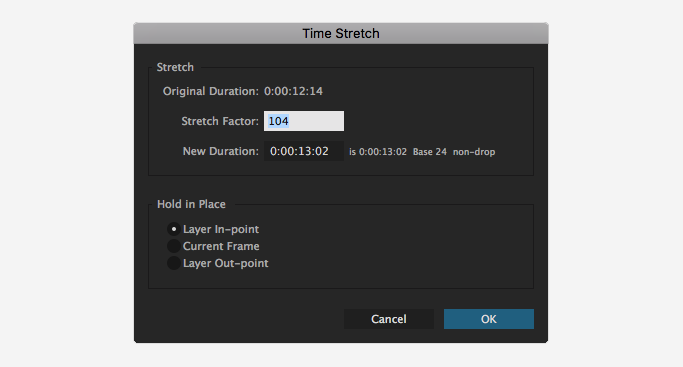
Oh, I almost forgot to tell you guys. Obviously footage comes in a bunch of different frame rates — “Frame Train” is at 23.97 fps, but some of the footage I used is 25 fps. For reasons related to math or something, just plopping in footage of a different frame rate can create an ugly, stuttering effect. At first I resigned myself to making some frame-by-frame adjustments, which I painstakingly did the first couple times.
Maybe you already knew this, but a simple way to avoid that stuttering look is to time-stretch your 25 fps footage to 104% (or your 29.97 fps footage to 125%) when bringing it into a 23.97 composition.
(Is that a cheesy way to deal with this problem?) ¯\_(ツ)_/¯
How about you? Any tips or tricks to share when stabilizing? Leave ’em in the comments!
Dissolve Premium (dissolve.com) has been the go-to for quality stock footage and photos by the world's top creative agencies and production houses. Some of the best filmmakers and stock producers from around the world are with Dissolve — our rapidly growing collection of unique, compelling footage is a testament to that. In addition to our quality stock footage and photography business, we launched Dissolve Creators (dissolve.com/creators/community). A platform for photographers, filmmakers, producers, and designers to connect and share their work as free downloadable content. We offer these creatives (amateur or pro) a bridge to our clientele, gig opportunities, networking opportunities, as well as our knowledge of the stock industry.
.png "sidebarassetDownloadV1 (1)")
.png "sidebarassetjoinV1 (1)")
.png "sidebarassetSocialV1 (1)")