Watch Everyday, Scribbled; following up on our Doodle Dissolve tutorial, we have created an alternate way of expanding creativity and complementing the use of our clips. We wanted to step it up a notch and introduce the dynamic element of 3D into this process to further enhance the transition from clip to clip.
1. Choosing your clips
When searching for the right clips, it’s best to look for specific movements and objects in the clips. Choosing clips with minor movements will ease your scribbling process.
Awake your creative side, as you associate different geometry forms and objects together. You can turn a basketball hoop into gymnastic rings, and then create a hula-hoop out of these same shapes. The possibilities are endless. If you have trouble finding the footage you’re looking for, you can contact our Customer Service team and they’d be happy to help you find what you’re looking for.
2. Reference 3D dynamics
If you’re a seasoned frame to frame animator, this step will probably seem ridiculous to you. But for everyone who’s little more generalist and is not focused only on frame to frame animation, the following step is helpful. We used Blender 3D for this step in Everyday, Scribbled but feel free to use any other 3D software of your choice. Blender 3D is available for free at blender.org, but don’t hesitate to donate if you’ll use it extensively.
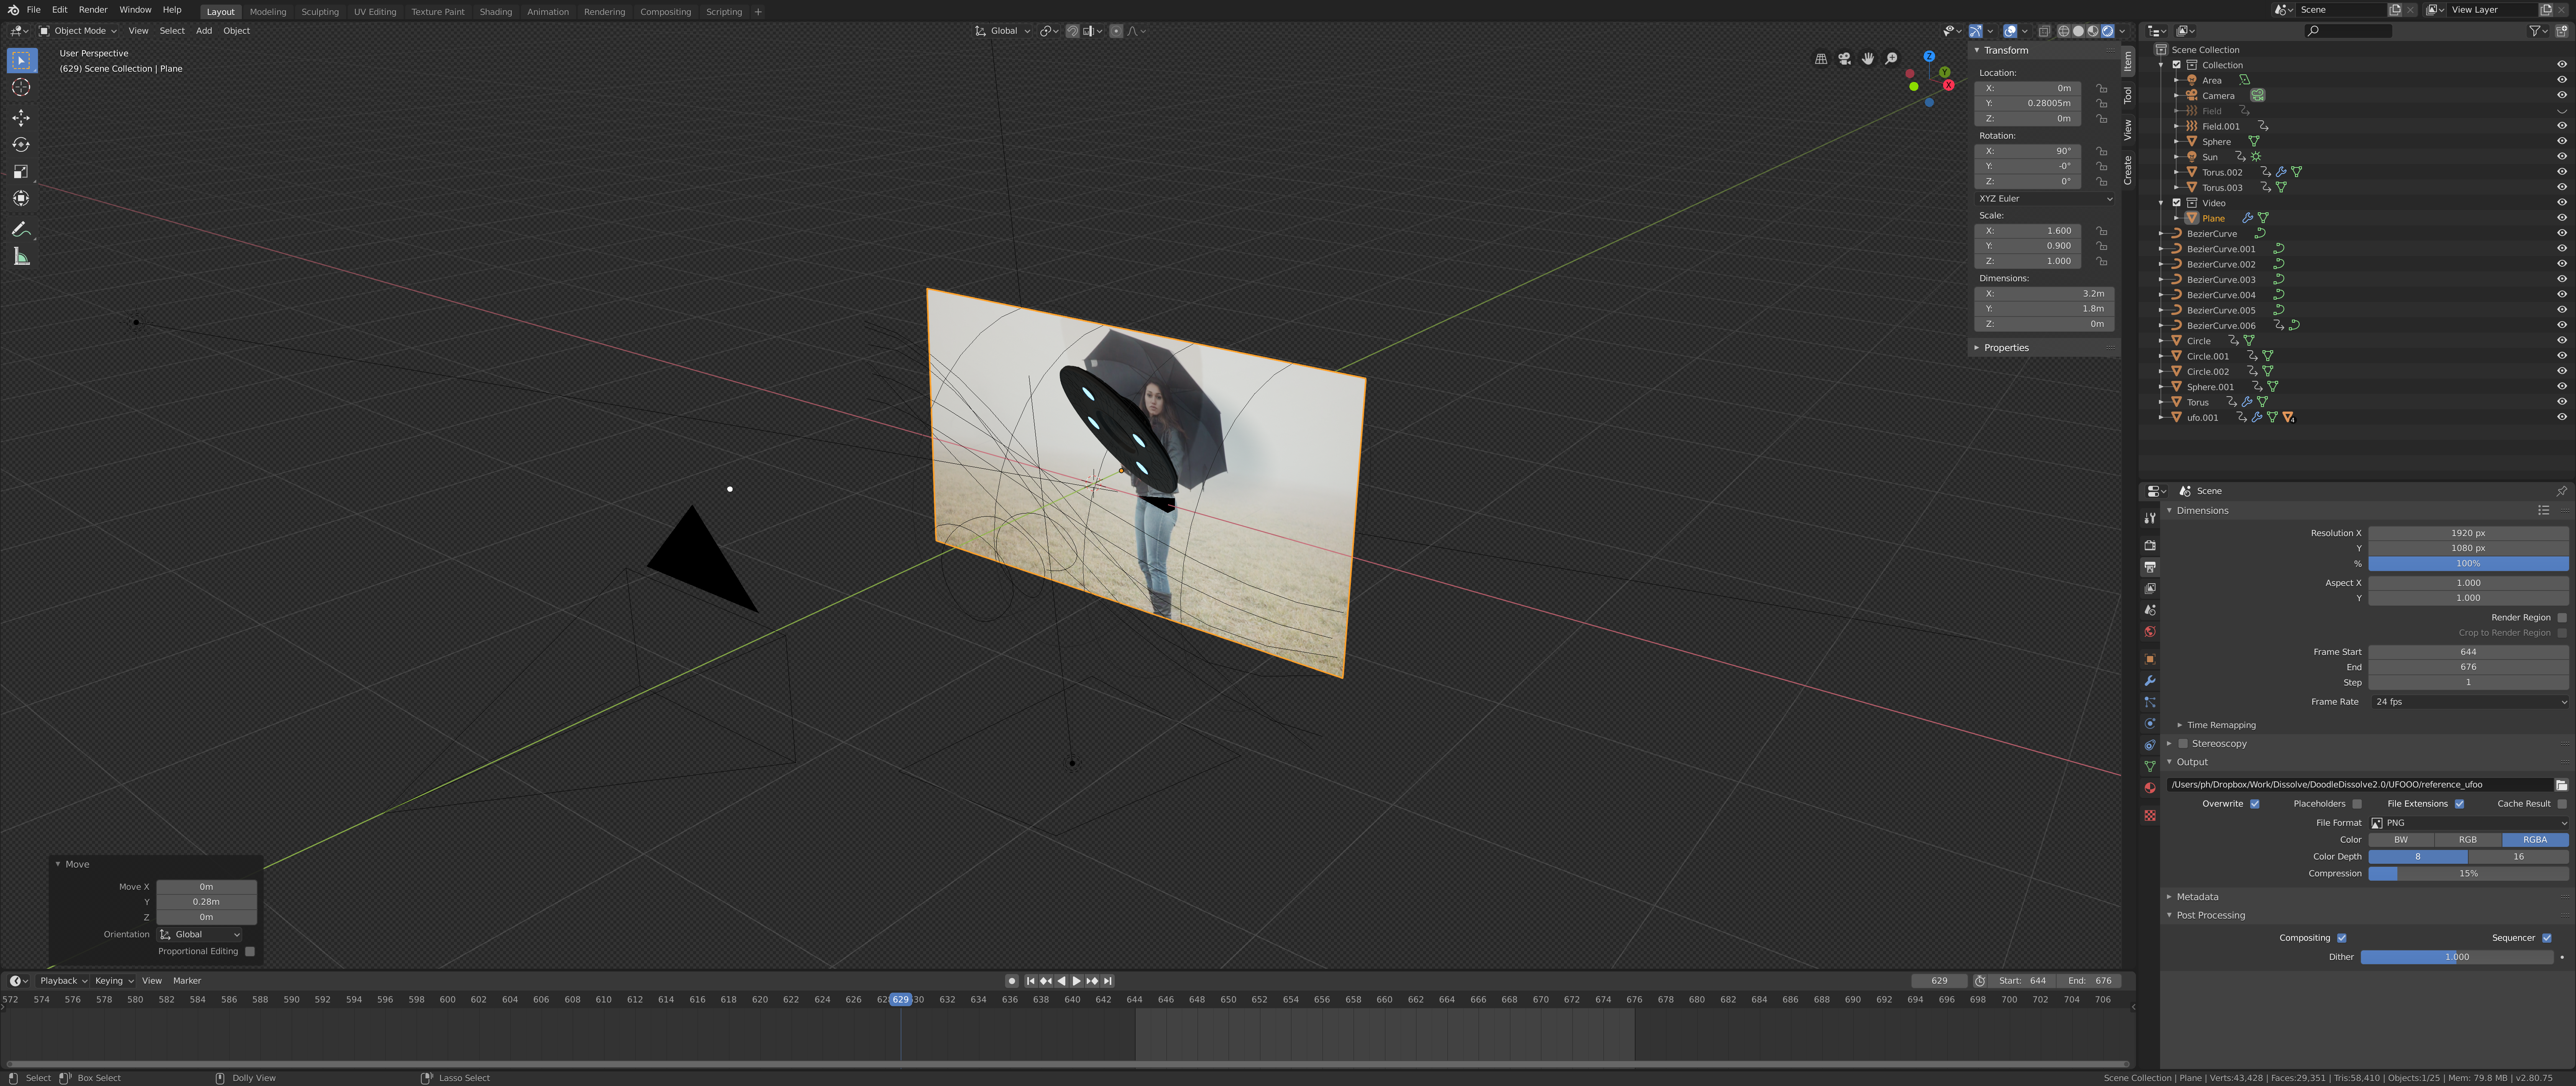
First, you can import a couple of frames from the end of the first clip in the transition and couple of frames from the beginning of the second clip you’re transitioning into.
Import the frames as a plane (or reference plane) and align your camera to fit the position and the focal length. Once you have that, you can model simple 3D shapes to match the object in the first clip. Think about the transition and try to create movements that will dynamically transform from one to the other. You can use keyframes to animate the objects and all kinds of physics or forces. The limit of what you can do is only up to you. Keyframes are the easiest to control, which is what we used in our video. When using keyframes, drive the movement of the elements you created so it ends up smoothly at the beginning of the second clip. Once you’re happy with the movement, make sure the lighting fits what the end result that you would like to achieve (render view in Blender). Then, render out the finished animation in the same resolution as the footage on transparent background into PNG sequence (Film – Transparent). This step is followed by importing the finished product into After effects, or another editing program of your choice, and match it into your edit. Lastly, render out the result through Media encoder.
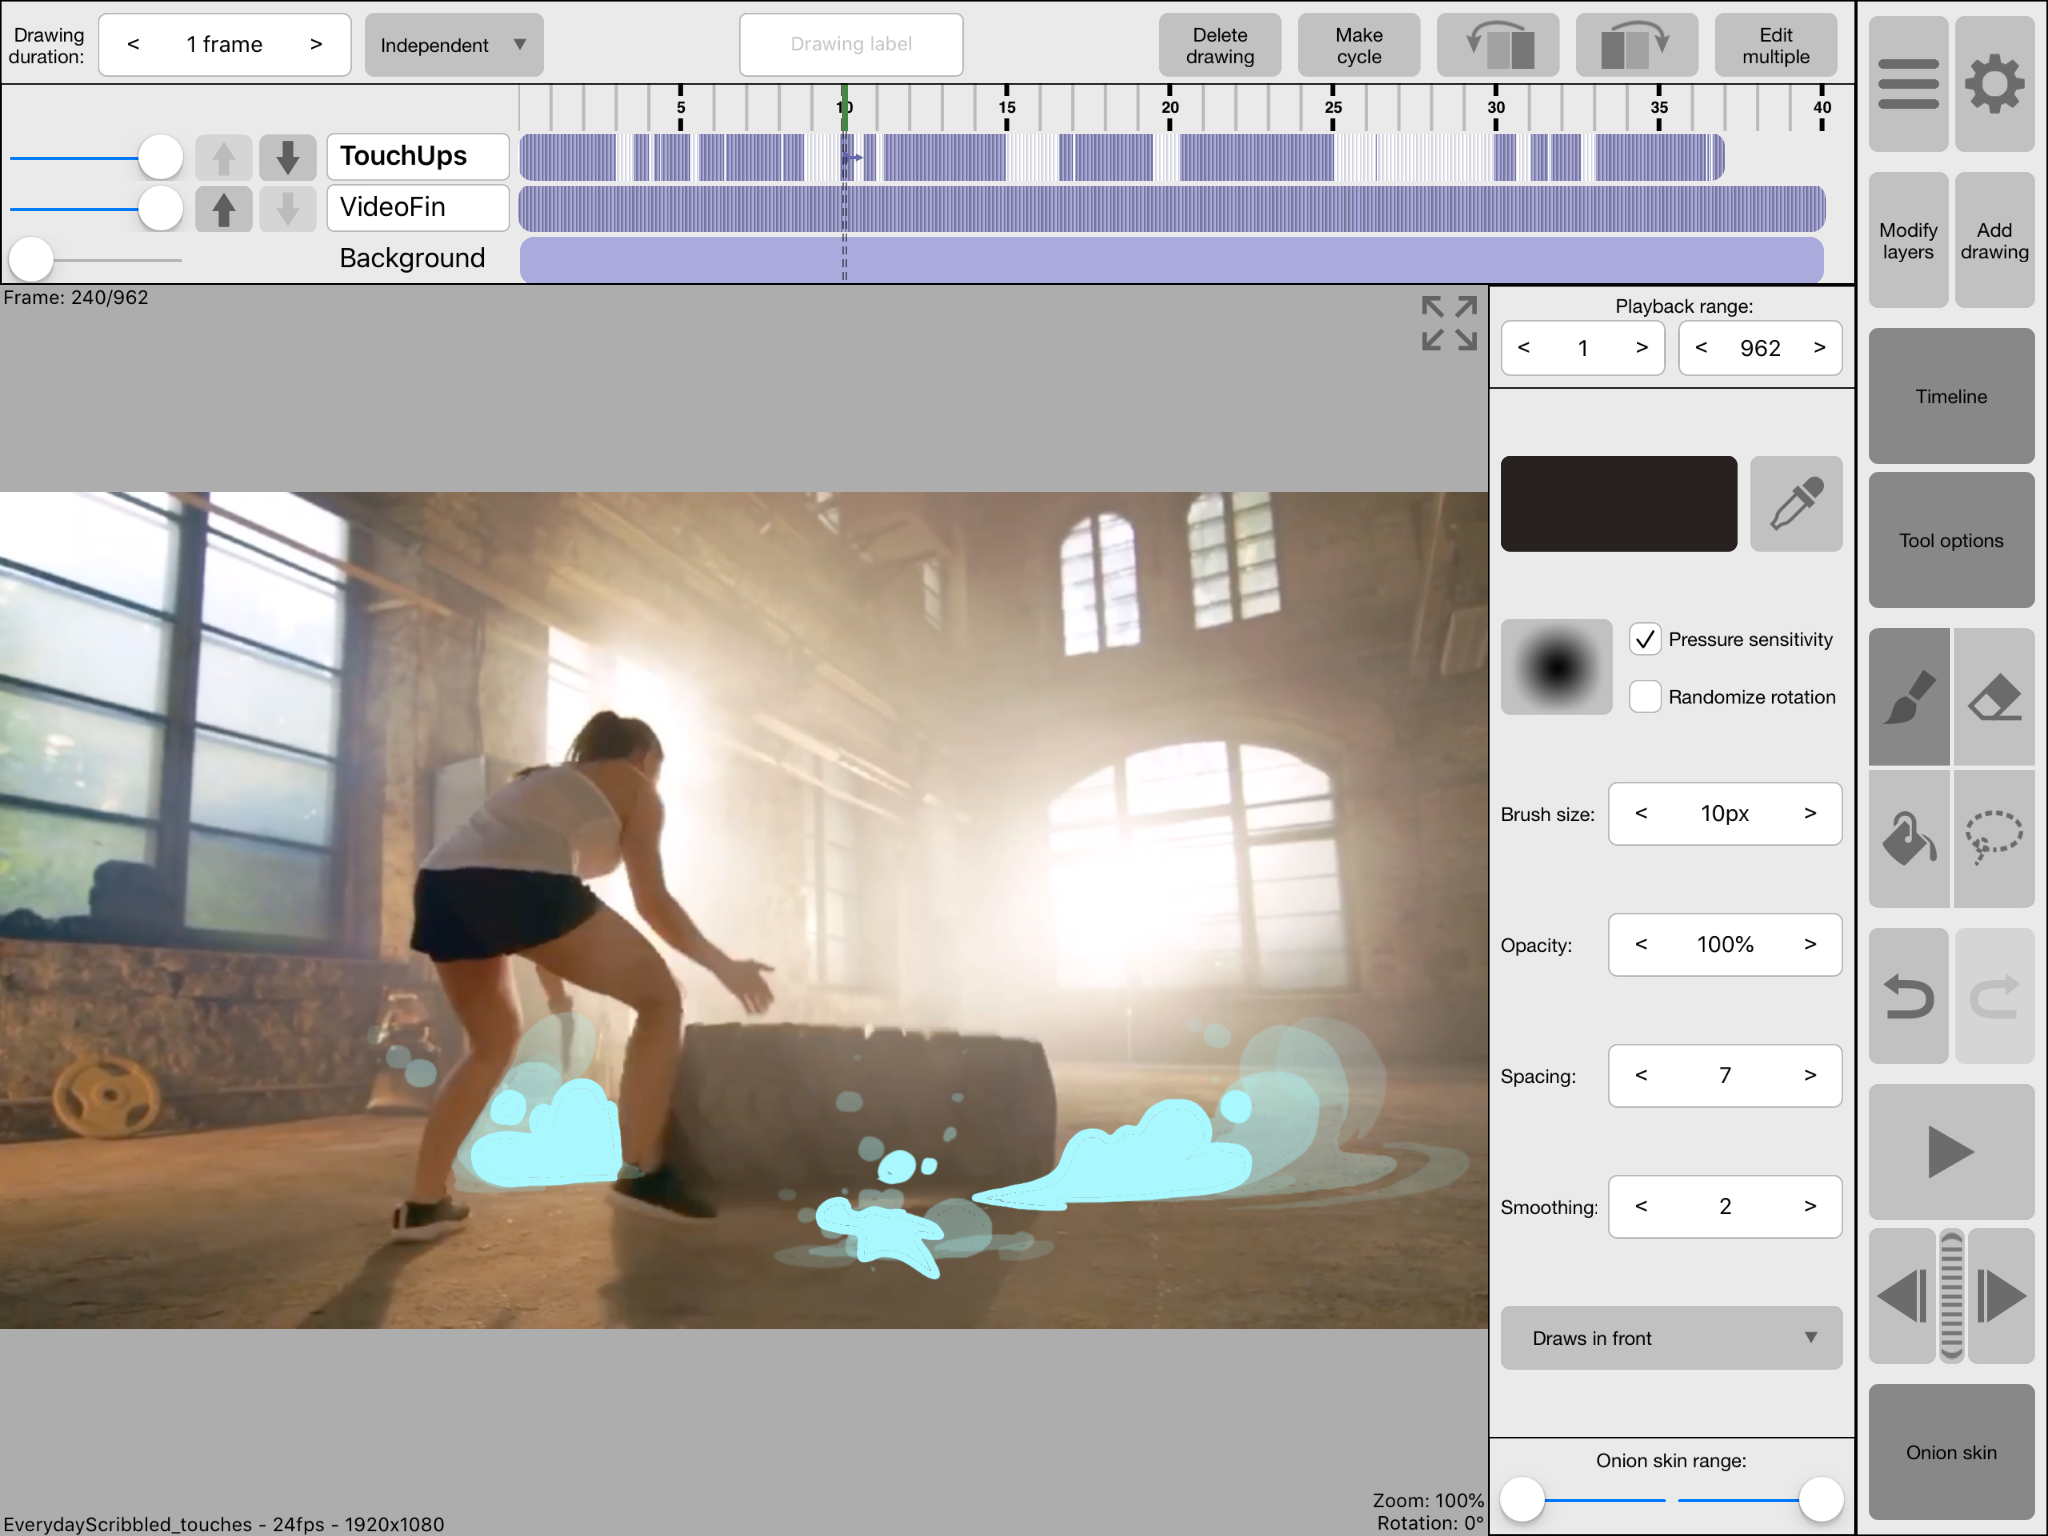
3. Start scribbling
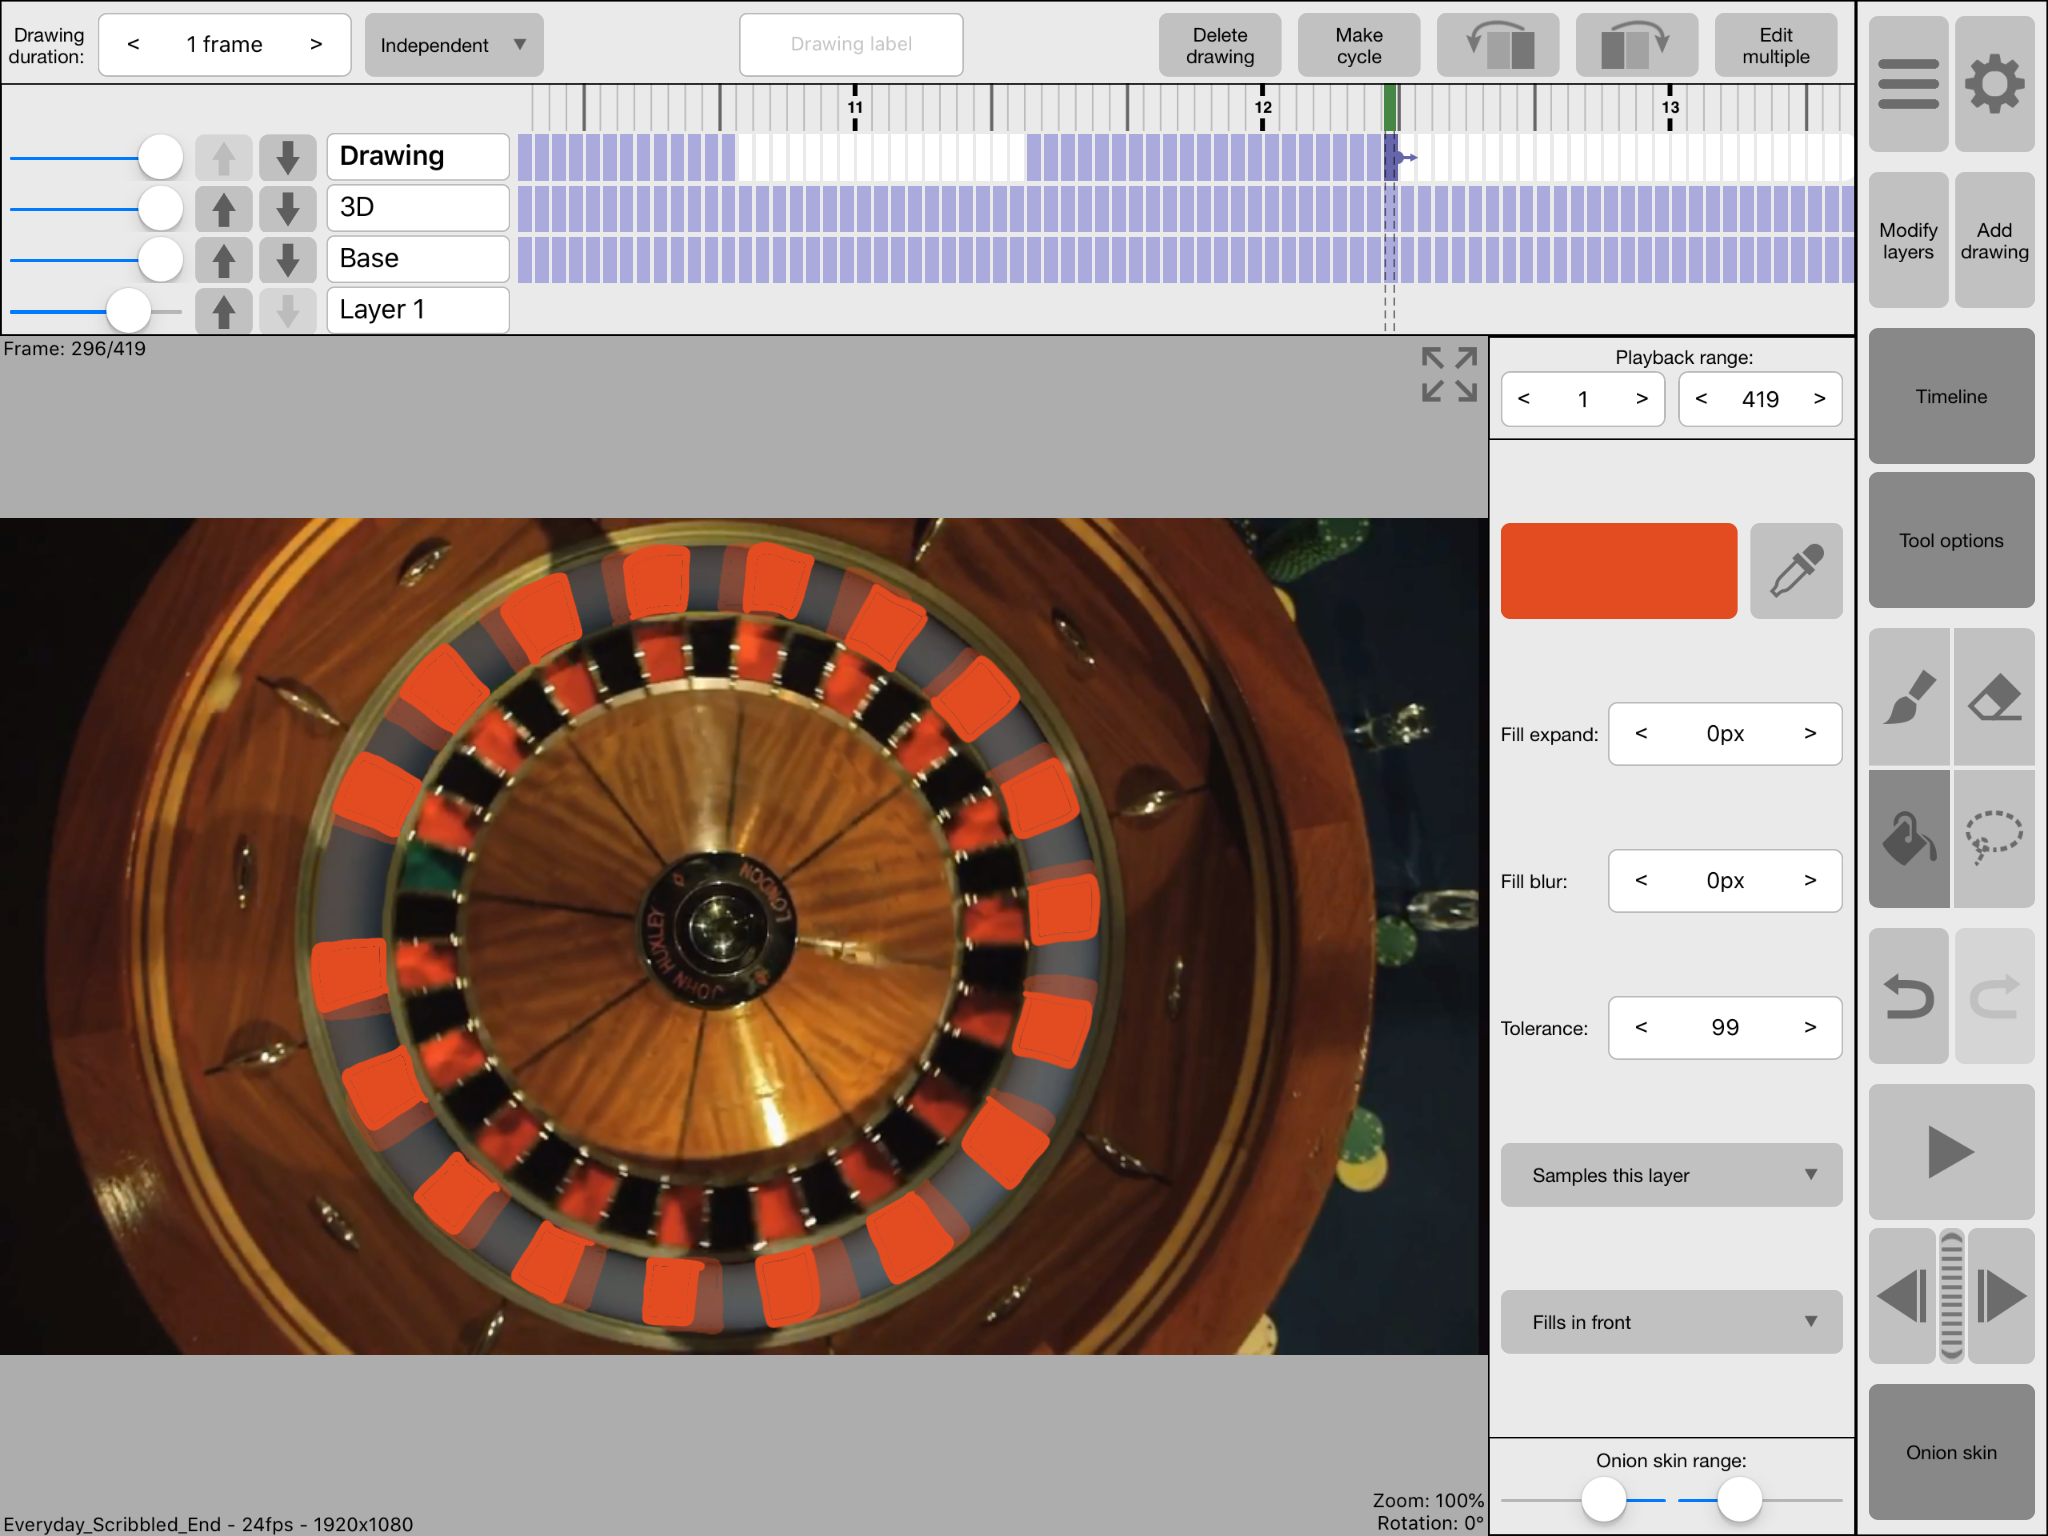
Once your 3D reference edit is finished, you can move on to the most fun part: drawing on each frame, where the 3D movements are used as a reference or part of the animation. In this case, we used an app called RoughAnimator, available for iPad (Learn how we used RoughAnimator on Doodle Dissolve here), but feel free to use a Wacom tablet or any other display with pen input. On the software side, you can substitute with Photoshop or any other software that fits your needs better. Once you’re done drawing, you can export your result or for even higher quality I always recommend to export PNG sequence of the soloed drawing layer and add it back to the edit in After Effects, where you can also adjust it further to your liking.
Now that we have shown you this creative outlet, you can use our tutorial to stimulate your imagination and create your own version of Everyday, Scribbled. We would love to see your original ideas come to life!
.png "sidebarassetDownloadV1 (1)")
.png "sidebarassetjoinV1 (1)")
.png "sidebarassetSocialV1 (1)")